Solutions page
The Solutions page lists all solutions in the Studio. From here you create, import, export, duplicate and delete solutions, and open a solution to set it up. This page applies to both Bin Picking Studio (BPS) and Locator Studio (LS).
A solution contains the full configuration of your application. After you complete all the required steps of the solution setup, the solution can be deployed.
Which of these actions you may do depends on your user role. See User access and permissions.
Solution list
The list has these columns: Name, ID, Robot, Author, Last modified, Type, Flags and Actions.
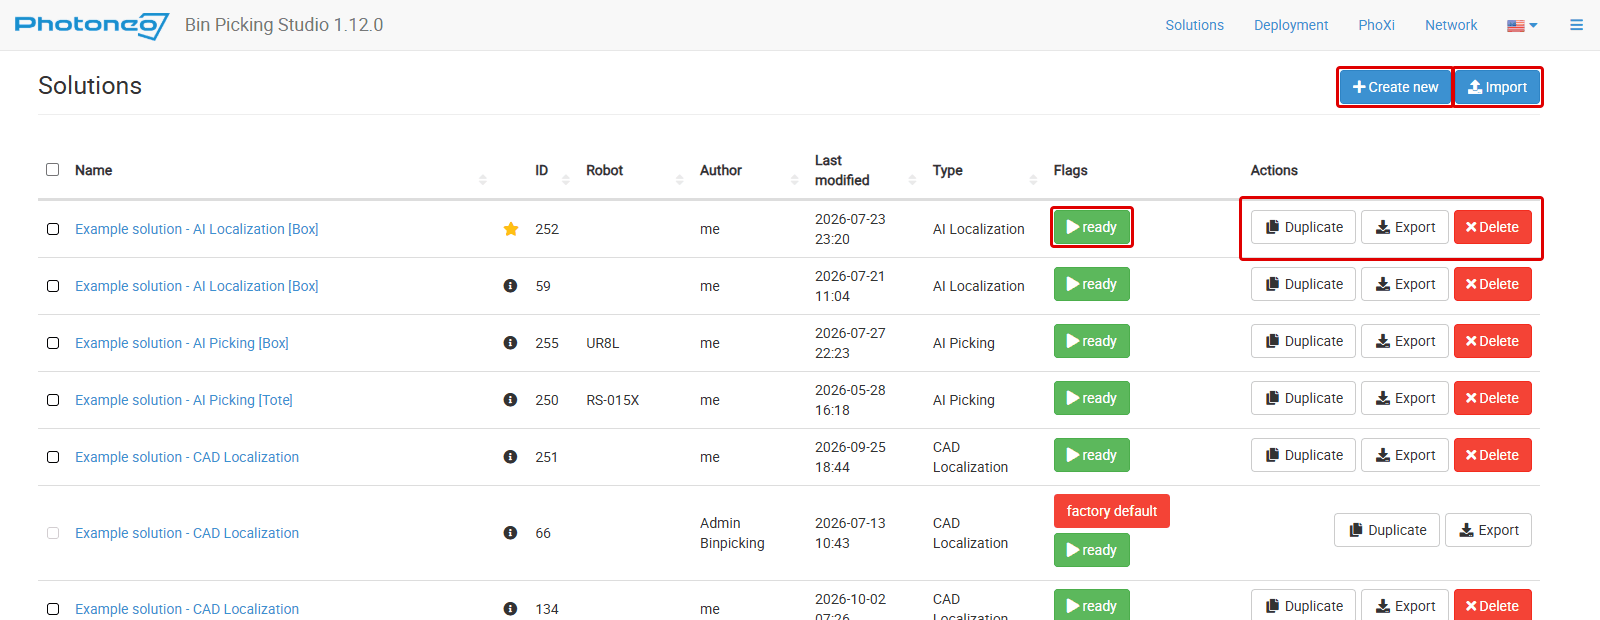
The Solutions page. Red frames: Create new and Import, the ready flag, and the Duplicate, Export and Delete actions of a solution.
The Flags column shows the state of a solution:
ready – This solution is ready to be deployed. Click the flag to deploy the solution. See Deployment page.
last run – This solution was last deployed.
factory default – This solution was preloaded in the factory. It may not be edited or deleted. To view or edit the solution, duplicate it.
Some solutions can’t be opened from the list. When you point at the name of such a solution, the Studio shows: “This solution cannot be accessed directly. Please duplicate this solution to create an accessible copy of it.”
The Actions column has the buttons Duplicate, Export and Delete for each solution.
The Studio contains example solutions, for example “Example solution - CAD Picking”, “Example solution - AI Localization [Box]” and “Example solution - Layer Localization”.
Creating a solution
Click Create new. The Create a new solution dialog opens.
Enter the Name of the solution.
Select the solution type: CAD Localization, AI Localization, Layer Localization, CAD Picking or AI Picking. For a description of the types, see Solution types.
Click Create.
If there is no valid license for the selected solution type, the dialog shows “No valid license found for this solution type” and you can’t create the solution. Check your license on the Software modules page.
Importing and exporting solutions
Solutions are exported and imported as .pbcf files.
To import a solution:
Click Import.
In the File field, select the
.pbcffile.Wait for the import to complete.
To export a solution, click Export in the row of the solution. The Studio prepares the solution and downloads it.
The attachments of a solution are included in the exported .pbcf file. See Attachments.
Duplicating a solution
Click Duplicate in the row of the solution to make a copy of it. Use a copy to try out configuration parameters without losing a good setup.
To view or edit a solution marked factory default, duplicate it and work with the copy.
Deleting solutions
To delete one solution, click Delete in its row and confirm.
To delete several solutions, select them with the check boxes in the list and click Delete selected.
Solutions marked factory default can’t be deleted.
Solution detail page
When you open a solution, the Solution step of the solution setup is shown first. The page header shows the name of the solution, its ID and its solution type. The page has the tabs Detail, Attachments and Activity log.
Detail
On the Detail tab you name the solution and describe its purpose. Give the solution a self-explanatory name and a short description. They help you remember the setup in older projects.
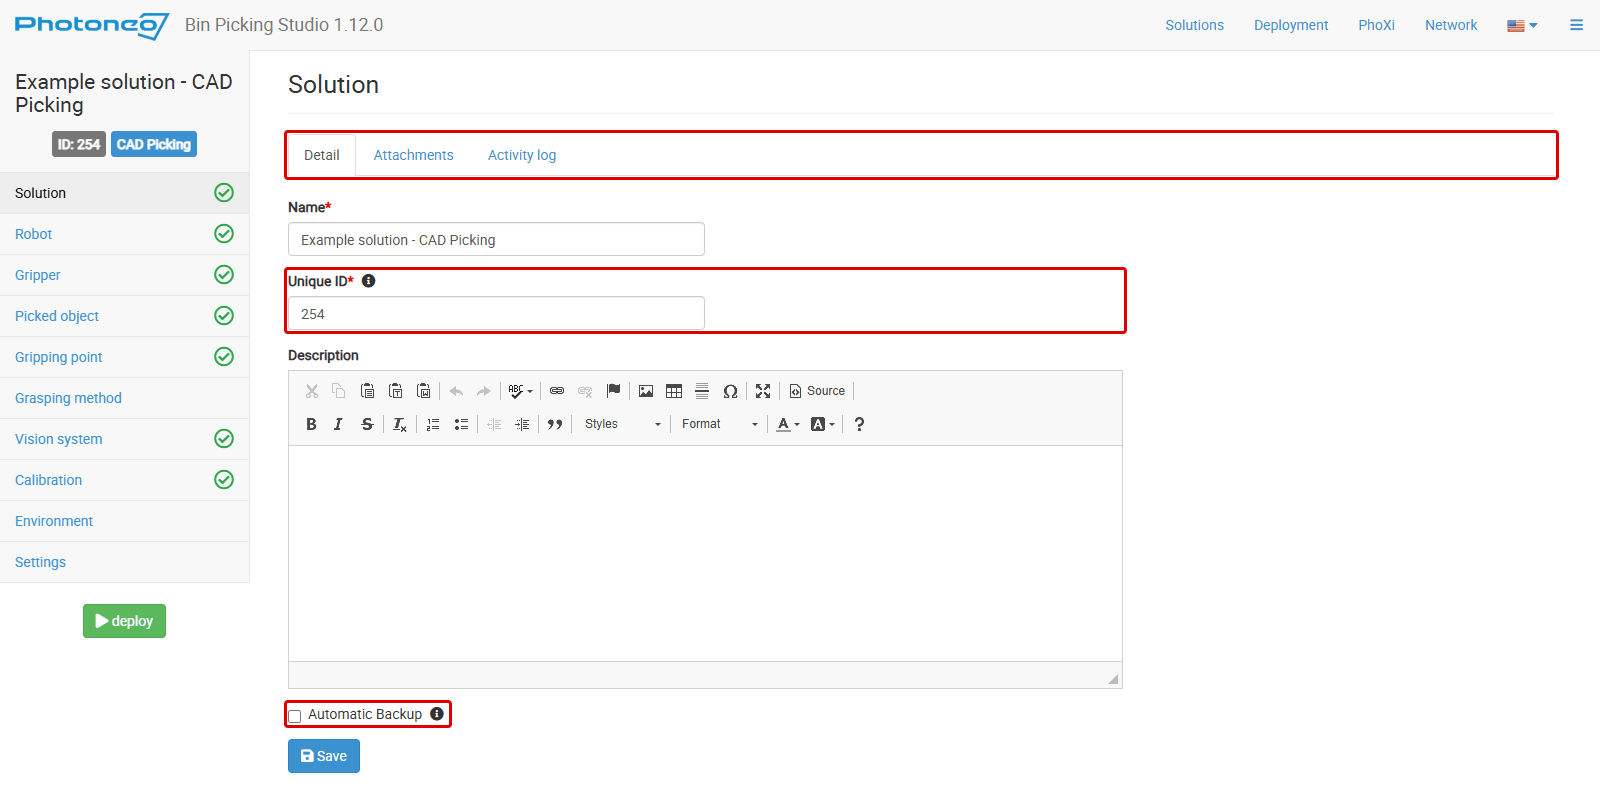
The solution detail page. Red frames: the Detail, Attachments and Activity log tabs, the Unique ID and Automatic Backup.
Name – The name of the solution.
Unique ID – Solution ID used in requests sent by a robot.
Description – A description of the purpose of the solution.
Automatic Backup – Upon each deployment, provided a change was made in the solution configuration since the last automatic export, the solution is automatically exported. Each solution has a unique name with the timestamp of the export.
Each solution export is stored in its own directory in
~/Desktop/Backup, with a name made of the solution ID and the actual name of the solution. Up to 3 exports are stored per solution, with the oldest one removed to make room for a new one. Directories for up to 3 lastly deployed solutions are stored, with the oldest one removed to make room for a new one.
Click Save to save the changes.
Attachments
On the Attachments tab you add files to the solution, for example robot program backups and other supporting documents.
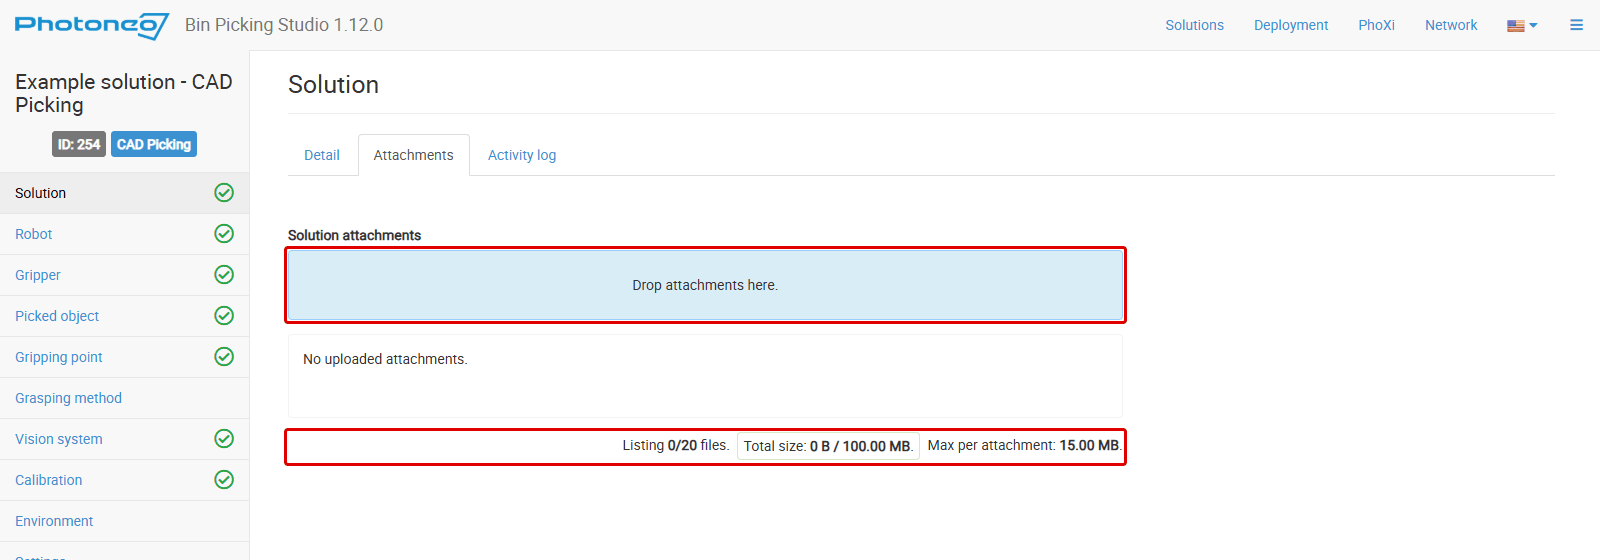
The Attachments tab. Red frames: the area to drop files on and the number of files, total size and size limits.
To add files, drop them on the attachment list or click the list and select them.
To delete an attachment, click Delete next to it and confirm.
The tab shows the number of files, their total size and the remaining space. Limits per solution:
up to 20 attachments,
up to 15 MB per attachment,
up to 100 MB in total.
Activity log
The Activity log tab shows past changes made to the solution by the users of the Studio.
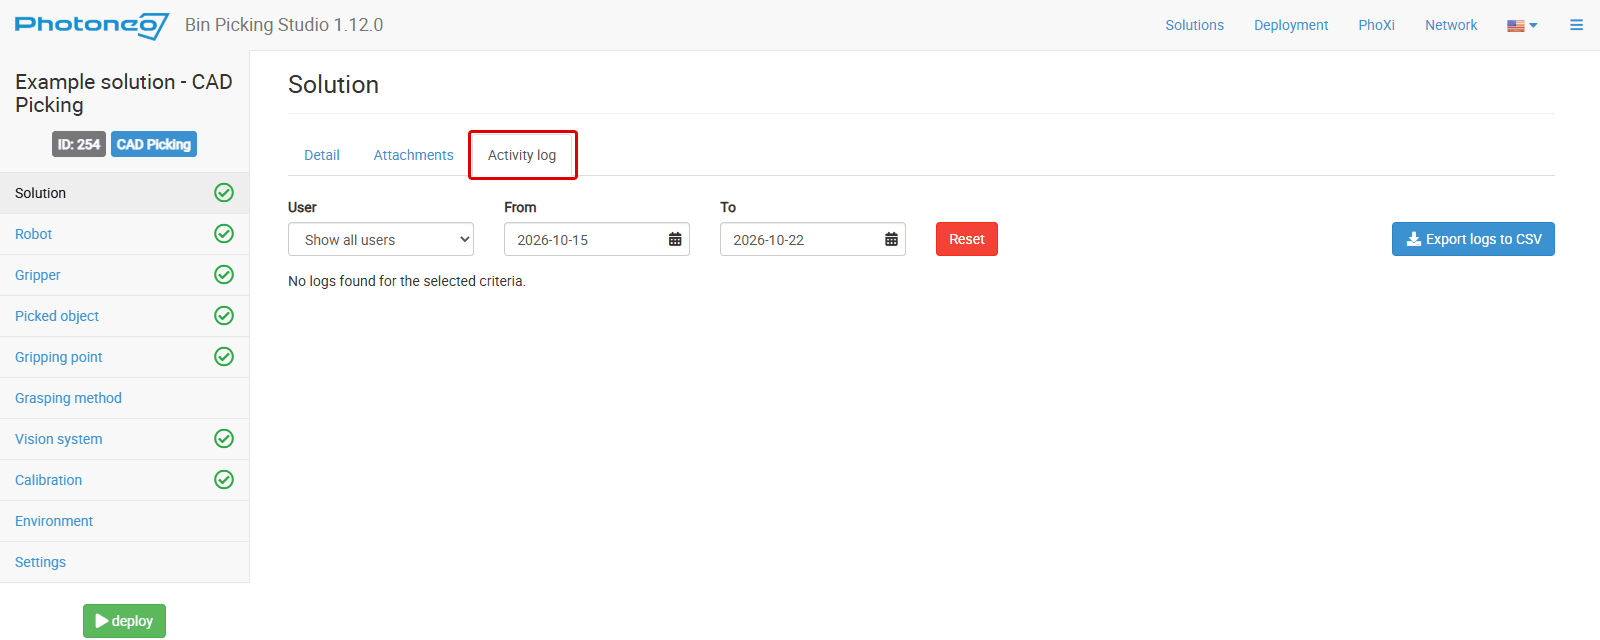
The Activity log tab (red frame) with the User, From and To filters, Reset and Export logs to CSV.
Filter the log by User and by period with From and To.
Click Reset to clear the filter.
Click Export logs to CSV to download the log as a CSV file.